With the plumbing and electrical phase one complete, the gentleman builder sanded and stained the beams with a mix of linseed and tung oil. The transformation was a bit Cinderella and we are very happy with the result.


The shower base was installed with cement sheeting and silicone at the joins.

We spent a great deal of time researching insulation. Ideally we would have loved to have purchased a pure wool insulation. In the UK you can purchase pure wool insulation, in New Zealand 100% wool that is treated with borax. In Australia, you cannot get such great products (note to Australian wool growers - there is a potential market here). So, we settled for Earthwool. It is made from recycled glass (read, beer bottles) and is lower VOC than any of the other products we looked at. You still need the full garb of safety gear to cut and install it but it's much less itchy than standard pink batts.

We purchased a second-hand plasterboard lifter and what seemed like an awful lot of pasterboard.

We started with the internal wall. Covering it with plain plasterboard made such a huge difference to the space.

Serious measurements were required to get a close fit around the irregularly shaped beams.


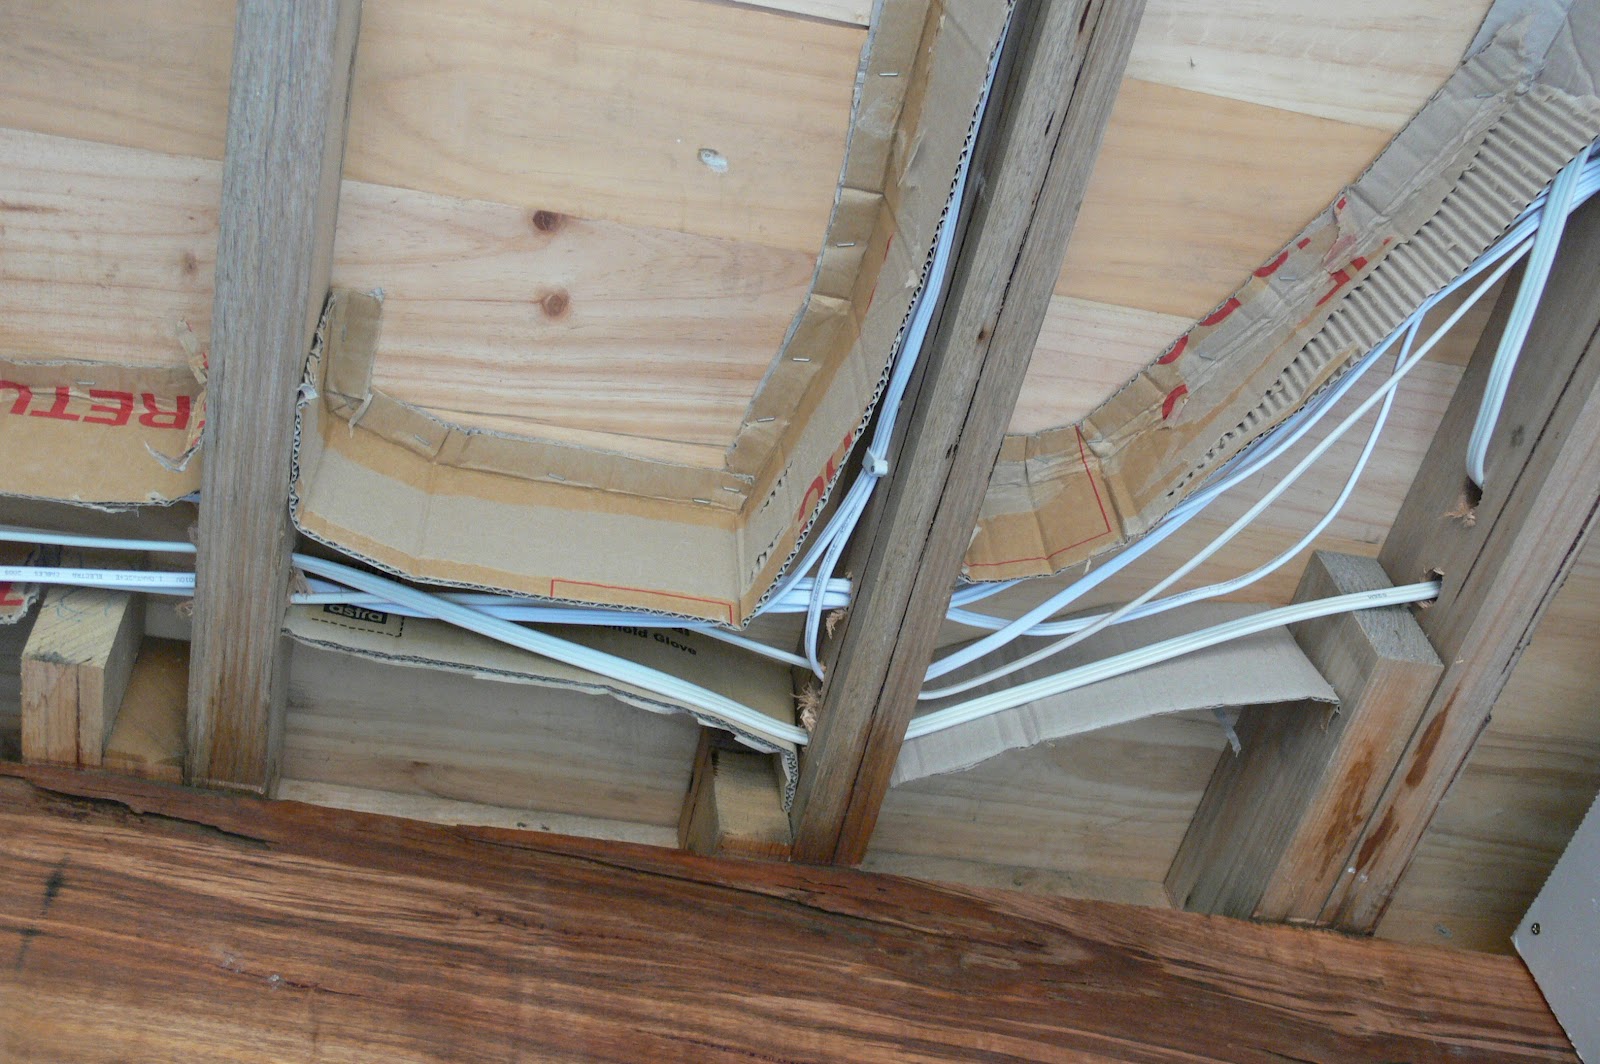
After the insulation dramas the resulted from the Victorian government rebates in 2007, changes were made to the building code which now requires a 5mm air gap between insulation and electrical cables. To achieve this you can purchase "standard" cardboard separators. These are available in standard nominal widths to suit common building timbers. We went for a cheaper option and recycled the cardboard boxes we get when we purchase fruit and vegetables from our local green grocer.

The Earthwool insulation was cut to length and installed. Initially we used string to hold it in place but we quickly learned that friction was enough to stop it from falling it we went straight to putting up the plasterboard.


Our joists were not standard spacing throughout the shouse because rather than employ the standard building practice which is to space the joists at 450mm centres and then the last two joists at whatever the leftover is. Mathematician that the gentleman builder is, worked out how many joists we would need based on 450 centres then divided the space by the number of joists and spaced them evenly. Thereby, we marked the location of the joists on the beam and the external walls so we could align the screws with the centre of the joists along the plasterboard.
The external walls, being rendered by hand over strawbales, are far from square. As a result, we utilised a technique which employs a pencil embedded in a block of wood to mark the wobbly edge of the plasterboard to match the profile of the wall. A plasterboard saw made pretty easy work of cutting the irregular edge.


Now it is back to rendering the third coat inside before the electrician and plumber come back to install fittings and fixtures.
No comments:
Post a Comment
Thanks for making a comment, your opinion is valued