Showing posts with label plumbing. Show all posts

Monday, 9 April 2012

Interior fit

With the plumbing and electrical phase one complete, the gentleman builder sanded and stained the beams with a mix of linseed and tung oil.  The transformation was a bit Cinderella and we are very happy with the result.


The shower base was installed with cement sheeting and silicone at the joins.

We spent a great deal of time researching insulation.  Ideally we would have loved to have purchased a pure wool insulation.  In the UK you can purchase pure wool insulation, in New Zealand 100% wool that is treated with borax.  In Australia, you cannot get such great products (note to Australian wool growers - there is a potential market here).  So, we settled for Earthwool.  It is made from recycled glass (read, beer bottles) and is lower VOC than any of the other products we looked at.  You still need the full garb of safety gear to cut and install it but it's much less itchy than standard pink batts.


We purchased a second-hand plasterboard lifter and what seemed like an awful lot of pasterboard.


We started with the internal wall. Covering it with plain plasterboard made such a huge difference to the space.

Serious measurements were required to get a close fit around the irregularly shaped beams.
 The result was pretty good!
After the insulation dramas the resulted from the Victorian government rebates in 2007, changes were made to the building code which now requires a 5mm air gap between insulation and electrical cables.  To achieve this you can purchase "standard" cardboard separators.  These are available in standard nominal widths to suit common building timbers.  We went for a cheaper option and recycled the cardboard boxes we get when we purchase fruit and vegetables from our local green grocer.
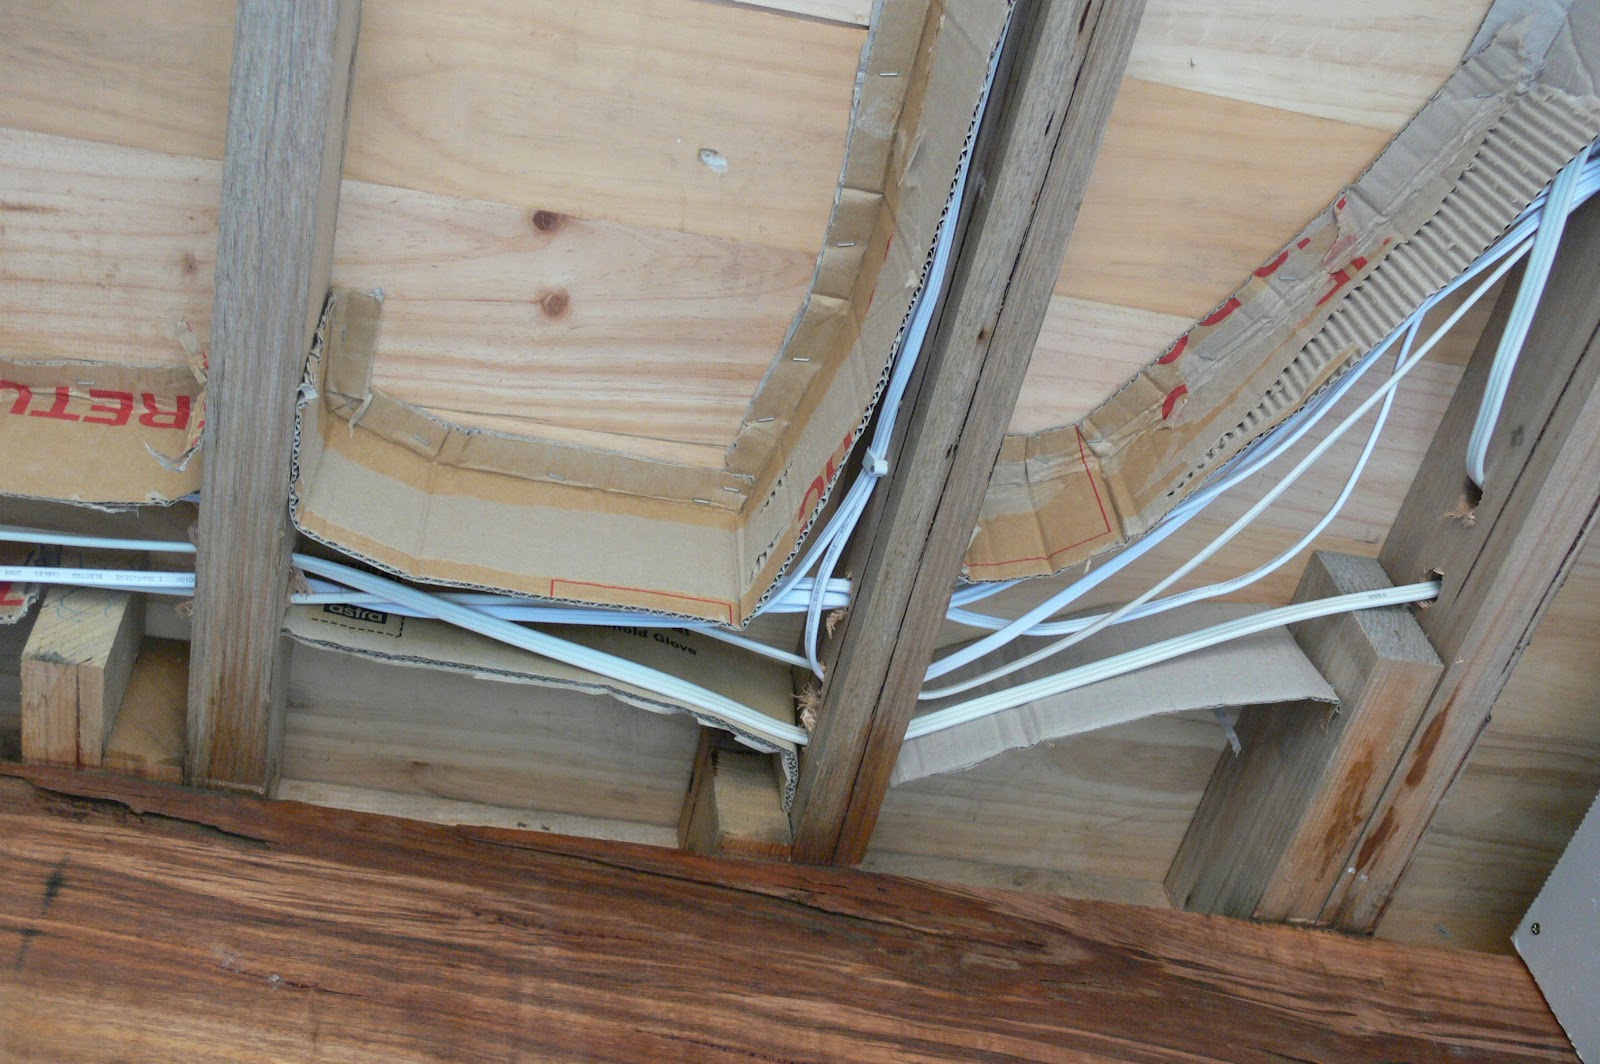
 Again the trusty staple gun earned its place among our most treasured tools.
The Earthwool insulation was cut to length and installed.  Initially we used string to hold it in place but we quickly learned that friction was enough to stop it from falling it we went straight to putting up the plasterboard.


Our joists were not standard spacing throughout the shouse because rather than employ the standard building practice which is to space the joists at 450mm centres and then the last two joists at whatever the leftover is.  Mathematician that the gentleman builder is, worked out how many joists we would need based on 450 centres then divided the space by the number of joists and spaced them evenly.  Thereby, we marked the location of the joists on the beam and the external walls so we could align the screws with the centre of the joists along the plasterboard.  
The external walls, being rendered by hand over strawbales, are far from square.  As a result, we utilised a technique which employs a pencil embedded in a block of wood to mark the wobbly edge of the plasterboard to match the profile of the wall.  A plasterboard saw made pretty easy work of cutting the irregular edge.


Now it is back to rendering the third coat inside before the electrician and plumber come back to install fittings and fixtures.


What goes on behind a wall

In November 2011, we were finally finished a full coat of render inside and removed all the strawbales.  We installed the conduit in the walls and were finally ready for the plumber and the electrician to do their first fit.

For a small house, it was amazing how much wire the electrician managed to install.

These wires will control the lights in the living and dining "rooms" and the fan in the space between the two.


It amazes me what a wall hides.  We have taken detailed notes about the location of the pipes and wires, especially in the bathroom where we plan to hang a mirrored medicine cabinet.

While I would have preferred the plumber to use entirely copper pipes, we just could not afford it.  I don't like the idea of unknown chemicals leaching from the plastic into our drinking water.  Unfortunately, we just did not have the finances to make a different choice.  We have consoled ourselves with the thought that at least our water is stored in food grade stainless steel and does not spend any additional time in plastic.


Wednesday, 15 February 2012

Worm farm waste system

We spent a fair bit of time researching septic systems; contemplated a composting toilet as an interim solution (but then realised that we would still need some kind of treatment system for our grey water) so decided on a worm farm waste system from A&A Worm Farm Waste Systems.  The service we received brilliant and I would not hesitate to recommend them.

The system includes a worm farm (essentially worms in a pit where all the solid components of waste go) and a series of overflow pipes downhill of the pit to filter the water waste.  The only limitation is that stock and food crops cannot be grown over the top of the pipes.  We bought a system that would cope with the shed toilet and the bathroom and ensuite planned for the house and a family of 6. 

This system worked in perfectly with our plan for a sustainable home.  There are no nasty chemicals, no need for pumping and dumping of solid waste and all the nutrients from our waste will fertilise the grove of Acacia melanoxylon trees that have since germinated near the site.
Delivery

My mad attempt at amusing the children while waiting for some action - pick up Little Miss and get Padawan to try to catch us
The kids tried to hide from the wind behind the tank and learned the hard way the laws of fluid motion

Swing time

Pure joy - Padawan gets to ride in the excavator
The pit is dug

The tank is installed

The vent pipe lasted a grand total of 3 days before the wind won and snapped it off at ground level.  The kids subsequently used it as a bridge on their 'fort'


Once the footings were complete we could measure up for the location of all the slab protrusions.  There were only two as we had worked hard to reduce them as much as possible.  Being amateurs, we were trying to make things as easy as possible for ourselves.  In doing so, we decided to have the kitchen and bathroom/laundry sink drain through the walls leaving only the toilet and shower running through the slab itself.

We struggled for weeks to find a plumber and eventually spoke with Mark from MBM Services in Moe who agreed to come out and provide us with a free quote.  Mark was really helpful and gave us loads of pointers.

We had Mark and his offsider come out to put the penetrations in.  They were a lot smarter more efficient and small digger for the job :
Mechanical shovel
 The large round penetration is the 'basin' catchment for the shower.  It's designed such that when you put the shower into place the drainage hole does not have to perfectly fit where the pipe it.  As each and every shower base is different, we actually purchased ours before we called our plumber in so we knew exactly where the final position of the shower is.

Toilet and shower penetrations
Pipe connecting to the worm farm