Showing posts with label bracing. Show all posts

Sunday, 19 February 2012

We made the right choice

While the gentleman builder worked on the roof, I took my hand to cleaning up the internal posts with an angle grinder and flap wheels.


We rushed like mad to get the internal ply wall up before the frame inspection.  As our luck would have it, it was a horrendous day.  Rain was coming in sideways and it was freezing - perfect December weather.

Padawan and Little Miss helped with great enthusiasm to paint the structural wall with linseed oil to protect it, somewhat, from the rain until the roof was up.

Hoodie and long sleeves in the middle of summer - welcome La Nina

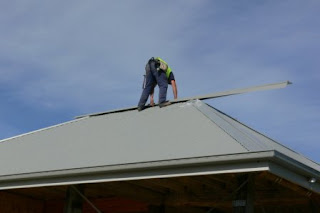
We had a couple of issues trying to get our building inspector to do the frame inspection, required before the roofing material is installed.  We got there in the end and just before Christmas 2010, we had the team from MBM services come to put up our Colorbond roof. 
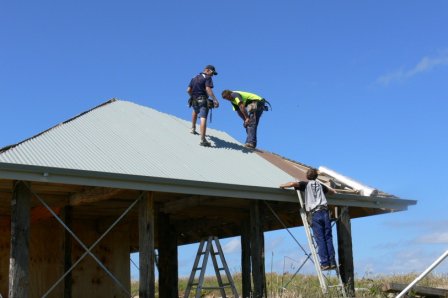
Ridge capping going on
I wanted some velux roof windows to let natural light into the attic and allow for ventilation of the shouse during summer.  We decided that two on the east wall would be best as we have a small kitchen window on the west wall and opening the kitchen window and the roof windows would allow for natural ventilation of the shouse, taking advantage of the sea breeze in the afternoon.  The budget being what it was, however, we had to compromise and purchased some perspex relicas.  While they are not exactly what I initially wanted, they do a great job at letting light into the attic and work just as planned to cool the upstairs space.


I am really very happy with the roof.  I love the colour and the pitch of the roof means that, even when I stand downhill of the shouse I get to admire it.

A top of beams


In October 2010 we started work on the roof structure. 

I was so impressed with the way that the joists looked when they went up.  It was hard work being up at the block and working long hours with no shade and the joist going up was brilliant as it meant that I could nail up an old sheet during the day to cast some shade onto the slab.  The wind, as usual, made it very hard to keep the sheet up but I could generally re-jig it in some way to make shade for the kids every day.

Our joists run in an east-west direction across the beams.  The standard spacing is 900mm but ours are nominally less than that.  My hubby's theory when it comes to building it to over engineer (it's one of the rare times when more is better).  The joists are attached to the beams with skew nails.  We left the middle section of the shouse without joists so we could get the ridge beam up through there when it was time.  This turned out to be a blessing and a curse.  While it made it much easier to get the ridge beam into the roof space, it meant that there was nothing to stand on when trying to secure the ridge beam.  To this day, I have no idea how the gentleman builder managed to do this (as this part was built on one of the days I was at work).  I imagine I never will!


The first two common rafters ready to go up. 
You can see in the photo above that there is a gap between the first two common that are ready to go up.  The gap is to allow for the ridge beam to fit in between the two rafters.  We used a piece of wood to attach the two rafters together to maintain the space for the ridge beam.  This worked pretty well, despite being a rudimentary solution.

You can just see, in the photo below, that we had a string line to ensure that the ridge beam was correctly positioned in the centre of the building.  It was at this point that we realised that there was a 3mm difference between the north wall (east to west) and the south wall.  Considering the scale of the project and the fact that we had used recycled timber for the construction of the base of the building, I was pretty impressed!

Common rafter with ridge beam


Braced for the night


We decided on a hip roof because we are in a high wind area.  Hip roofs are the strongest design if you are not going with trusses.  The reason we did not want to use trusses was two-fold.  Firstly, it was more expensive to buy prefabricated trusses.  Secondly, we wanted to be able to make use of the space in the ceiling for storage.  My brother-in-law recently suggested that adding another metre to the height of the walls and having that in the attic space would have made the upstairs a much more livable.  Pity we didn't get that pearl of wisdom 18 months earlier, really! 


I loved the view from inside was just beautiful.  I hate heights but it was so worth climbing up to see the rafters join together in perfect symmetry.


The roof frame was finished on 12/12/2010.  The bracing was then put on in preparation for the plumbers to come in to put the tin on.
Just to be sure, tie downs were added over the rafters

We then put all the framing in for the door and windows.

Bracing was then added to the roof and the posts where there were no windows or doors.

Roof bracing and fascia painted

Wall bracing