Showing posts with label Building. Show all posts

Friday, 6 July 2012

Busyness

I've already spoken of switched on living and reflective practices that, I believe, are fundamental to living a full life.  I've touched on authenticity and living organically; true to yourself and your ideals.  An overlay on all of this is the pressure to be busy.  I see so many people that have back-to-back activites - Monday is netball, on Tuesday there's gym, Wednesday is social night, Thursday partner night and Friday the kids get taken to McDonalds and the weekend in punctuated with appointments and gatherings.  I see people rushing through life - doing what I can only describe as "stuff".  The time they spend bustling around in the morning and evening after work does not seem to generate anything.  It's just activity (see the eloquent writing of Tim Kreider). 

There are so many people rushing around all the time .  And, most of the time, I am one of them.  My days in Melbourne are punctuated with long hours in the office, catch ups with much-neglected friends and desperate attempts to squeeze in some form of physical activity.  In amongst all that I try to make meals for the family for the following week, plan further education for myself and the kids and collect supplies for the build.  Weekends are spent building the house, catching up on washing and cleaning at home, paying bills and caring for children. 

I can cope with this current level of busyness as, I hope, it's a short-term gig for us.  I took a job in Melbourne to pay for the build; so I can see The Gentleman Builder's childhood dream come true; so I can provide a better life for my gorgeous children and so I can spend some time with my terminally ill father, my family and my friends that I haven't spent much time with since moving to Gippsland 5 years ago.  I have a brilliant job that I really love and get to work with some exceptionally talented, interesting and stimulating people.

But I freely admit this is not the end for me.  My plans do not live a life where I am away from my family.  My goal is to settle into country living.  Not the idealised country life where everything is scones and leisurely walks (though I do plan to include those things in abundance) but the reality of country life; where I will get stuck into the seasonality of life.  A life where we will fertilise and plant furiously in the spring to be able to harvest in the autumn.  Where activity comes in bursts interspersed with moments, days I hope, of nothingness.  Where, should the weather be fine and the wind be weak, I could choose a good book from the shelf and settle into the hammock to soak up some vitamin D and get lost in another world.  I dream of a life where I could decide to pick up the camera and take photos all day.  I envisage our block set up with sheep, goats, pigs, chooks, geese and ducks; where the flowers grow in abundace and I spend many long hours enjoying the view.  I hope for a life that is reflective, honest and peaceful.  A life that is overflowing with fresh organic produce for long lunches and dinners with friends that feed both the stomach and the soul. 

I dream of, even crave, times of hard work - I am not averse to work; even in abundance.  But I believe work should be followed by rest.  Time to relect on life.  Time to share thoughts and ideas with others; time to soak up sunshine; time to let the wind blow through your hair and take your troubles away; time to just be.

Sunday, 26 February 2012

Laying the strawbales


Water is cancer for strawbales.  In order to protect the straw from moisture, it is laid atop wooden boxing that is filled with gravel.  This ensures that, should moisture get into the walls, it can drain down through the straw and rest in the gravel away from the straw before draining outside.  Ideally, water would not get into the walls and that's our aim but, in the unlikely event of a washing machine or dishwasher-based emergency, it's important to be prepared.

Strawbale walls are strapped to the floor and to the top beam as tie-down.  This can be achieved a number of ways.  Many people are making strawbale walls with nylon strapping that can be ratcheted down.  We could not afford this option.  So we used fencing wire instead.  We made strips of wire with loops on both ends that were secured under the bottom boxing.

The bottom boxing was secured to the slab with dynabolts.  The boxing was secured to the posts with skew nails. 


The boxing was then filled with gravel and levelled:
Funky corner piece near the front door

The strawbales were then laid in a brickwork pattern where one bale overlaps two halves below.  As the strawbales are not perfect rectangles, the gentleman builder made a bale hammer.  We affectionately called it Stress Relief.

We have had a suggestion from a friend that stress relief should be hung ceremoniously above the front door!

Once the strawbales were laid, the top boxing was put in place so the strawbales could be compressed down.  A fencing wire strainer was then used to tighten the wire over a three day period.


We were battling a very wet year and built the wall in sections.  In each section, the bales were laid, straightened and then rendered on the outside.  We then hung a tarp up to offer further protection to the wall from rain.

North east corner baled


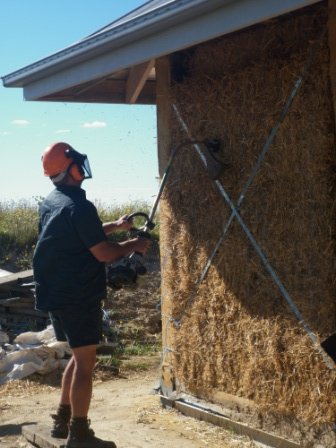
Low tech solution to loose ends of straw - whipper snipper to the rescue


In the sections where a straw bale did not fit, we either made small bales using a tool the gentleman builder forged.  It's essentially a large needle that you poke into the bale a the required length and feed baling twine into it and tie the twine off.  Alternatively, loose straw was packed into spaces that a bale would not fit.  Where loose straw was used, we stapled chicken mesh up to hold the straw in place.


Initially we made cob (straw, clay and water) to fill any gaps before rendering with the lime render (sand, lime putty and water).  The cob was pretty easy to make and apply but the clay content meant it swelled and shrank a lot and made the overlying render crack terribly.

Little Miss loved making cob

And the fact that we encouraged her to get her feet dirty
Cob filling a hole where two bales meet


Prior to rendering, all non-straw surfaces (wood and metal) were painted with a mixture of watered down PVA and sand.  This helps the render to stick to the surface.  Furthermore, the straw needs to be damp before applying render to ensure the render sticks.  Initially we used a pump action spray bottle to wet the straw.  We then purchased a whiz-bang pump action sprayer.  On the second coat of render outside, we resorted to a 10 litre plastic watering can.  The reasons for this are two-fold.  Firstly, the hand and pump action sprayers broke and cost a fortune.  Secondly, the watering can will apply a larger volume of water in about a tenth of the time.  We're still unsure what we are going to use when it comes to applying the third coat inside as, clearly, a watering can will make too much of  a mess indoors.
 
Lime is hard on skin and ridiculously painful if it gets into eyes so we wore protective gear when working with it.  Gloves and eye protection are a must. 

We apply the render with standard tools - rectangular and triangular trowels.

Spraying the wall prior to the application of render


North east corner rendered

Our rendering technique has vastly improved over the life of the build.  We ended up coming back to the first section of wall for a second attempt at a first coat.  As you can see on the right hand side of the photo below, our first attempt was pretty rough.


The gentleman builder initially made the render by hand in the wheelbarrow but it was seriously back breaking work and ended up purchasing a second-hand cement mixer.  It's some of the best money we spent on the build.


Padawan and Little Miss, despite all our best efforts at discouragement, would play on the sand pile.  In one of the first few loads of render, we had a fatality:

One of Little Miss' toy bugs was rendered into the wall and had to be pulled out.  It was subsequently washed and suffered no long lasting ill effects.

Tuesday, 21 February 2012

Straw, glorious straw

My brother-in-law grows grain to feed to stock.  We came to an agreement where he would arrange for the harvesters to cut the wheat straw when they harvested the grain, for a price.  I love that  we made use of a farming waste product in the construction of our home.  It took very little extra energy on behalf of the harvester to cut and bale the straw when threshing the grain.

I had some great photos of the harvesting but they were lost when our computer crashed.  So imagine a dry paddock with wheat and a big green harvester spitting out square bales of straw tied together with yellow bale twine.

On January 8 2011, the straw bales were delivered and stacked, literally, to the rafters.  Well, they are technically joists but you get the idea.

You can see, in the photo above, that we had the foresight to put the floorboards for the attic into the roof space before the roof was put on.  The floorboards are 5m long and were slid up into the roof space from the south end of the shouse prior to the colourbond going on.

The weather was still against us with La Nina giving us her best.  On January 12 at just before midday, it looked like this and was cold enough to warrant long sleeves and a jumper.:


Sunday, 19 February 2012

Waiting, waiting, waiting

While waiting for the grain to mature so the straw could be harvested, we put in place the frame for the door and the windows.  All the windows and the door are second hand.  All are solid timber.  All required (or still require) a lot of work to bring them up to scratch but we felt strongly about not buying new what we could get secondhand.  The money we saved ourselves was an added bonus.

Bedroom window and bathroom window in place

You might be able to see, in the photo above, that we had painted the external brackets with zinc rust proofing paint.

Door frame in place
In the photo above, you can see that we had some leftover hardwood spaced out on the floor.  This was to keep the straw off the floor in case moisture got in.  Moisture is cancer for strawbales.

Not being a patient person, I was chomping at the bit and hanging to get started on constructing the walls.

We made the right choice

While the gentleman builder worked on the roof, I took my hand to cleaning up the internal posts with an angle grinder and flap wheels.


We rushed like mad to get the internal ply wall up before the frame inspection.  As our luck would have it, it was a horrendous day.  Rain was coming in sideways and it was freezing - perfect December weather.

Padawan and Little Miss helped with great enthusiasm to paint the structural wall with linseed oil to protect it, somewhat, from the rain until the roof was up.

Hoodie and long sleeves in the middle of summer - welcome La Nina

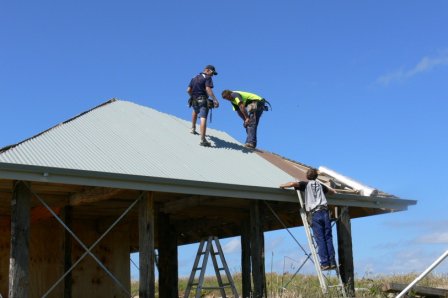
We had a couple of issues trying to get our building inspector to do the frame inspection, required before the roofing material is installed.  We got there in the end and just before Christmas 2010, we had the team from MBM services come to put up our Colorbond roof. 

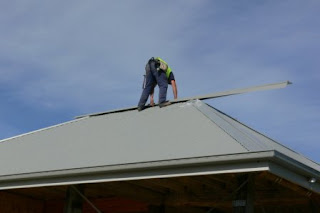
Ridge capping going on
I wanted some velux roof windows to let natural light into the attic and allow for ventilation of the shouse during summer.  We decided that two on the east wall would be best as we have a small kitchen window on the west wall and opening the kitchen window and the roof windows would allow for natural ventilation of the shouse, taking advantage of the sea breeze in the afternoon.  The budget being what it was, however, we had to compromise and purchased some perspex relicas.  While they are not exactly what I initially wanted, they do a great job at letting light into the attic and work just as planned to cool the upstairs space.


I am really very happy with the roof.  I love the colour and the pitch of the roof means that, even when I stand downhill of the shouse I get to admire it.

A top of beams


In October 2010 we started work on the roof structure. 

I was so impressed with the way that the joists looked when they went up.  It was hard work being up at the block and working long hours with no shade and the joist going up was brilliant as it meant that I could nail up an old sheet during the day to cast some shade onto the slab.  The wind, as usual, made it very hard to keep the sheet up but I could generally re-jig it in some way to make shade for the kids every day.

Our joists run in an east-west direction across the beams.  The standard spacing is 900mm but ours are nominally less than that.  My hubby's theory when it comes to building it to over engineer (it's one of the rare times when more is better).  The joists are attached to the beams with skew nails.  We left the middle section of the shouse without joists so we could get the ridge beam up through there when it was time.  This turned out to be a blessing and a curse.  While it made it much easier to get the ridge beam into the roof space, it meant that there was nothing to stand on when trying to secure the ridge beam.  To this day, I have no idea how the gentleman builder managed to do this (as this part was built on one of the days I was at work).  I imagine I never will!


The first two common rafters ready to go up. 
You can see in the photo above that there is a gap between the first two common that are ready to go up.  The gap is to allow for the ridge beam to fit in between the two rafters.  We used a piece of wood to attach the two rafters together to maintain the space for the ridge beam.  This worked pretty well, despite being a rudimentary solution.

You can just see, in the photo below, that we had a string line to ensure that the ridge beam was correctly positioned in the centre of the building.  It was at this point that we realised that there was a 3mm difference between the north wall (east to west) and the south wall.  Considering the scale of the project and the fact that we had used recycled timber for the construction of the base of the building, I was pretty impressed!

Common rafter with ridge beam


Braced for the night


We decided on a hip roof because we are in a high wind area.  Hip roofs are the strongest design if you are not going with trusses.  The reason we did not want to use trusses was two-fold.  Firstly, it was more expensive to buy prefabricated trusses.  Secondly, we wanted to be able to make use of the space in the ceiling for storage.  My brother-in-law recently suggested that adding another metre to the height of the walls and having that in the attic space would have made the upstairs a much more livable.  Pity we didn't get that pearl of wisdom 18 months earlier, really! 


I loved the view from inside was just beautiful.  I hate heights but it was so worth climbing up to see the rafters join together in perfect symmetry.


The roof frame was finished on 12/12/2010.  The bracing was then put on in preparation for the plumbers to come in to put the tin on.
Just to be sure, tie downs were added over the rafters

We then put all the framing in for the door and windows.

Bracing was then added to the roof and the posts where there were no windows or doors.

Roof bracing and fascia painted

Wall bracing


The gentleman builder

Today, we visited The Milk Maid Marian who had relatives visiting from Melbourne.  Marian introduced us to her visitors and spoke of the work that we had been doing at the block.  Marian spoke of the obstacles we have faced and the successes we have had.  Marian suggested to my husband that he should write a book about his work.  Not only is he responsible for building our home but he also homeschools our beautiful children and does a pretty amazing job!

Marian mentioned the book a number of times and eventually came out with the name for it - The Gentleman Builder.  

So, once again inspired, I will from here on in refer to my husband as the gentleman builder.

My husband is an incredible man.  He is exceptionally patient, he is creative, persistent and the most intelligent man I know.  He's not only book smart (reading is one of the main passions in his life) but he can apply the knowledge he has to new situations as well.  To top it off, he is witty too.  In my opinion, he's a pretty good catch and I consider myself lucky to have him in my life.

My husband is a brilliant artist.  Mum has a framed picture of my foot in her lounge room that the gentleman builder drew one day while I was sleeping.  He's also able to create beautiful things with wood.  He makes knives, he's built a boat and he is also brilliant when he gets working at the forge.  Out of the bolts we pulled from the posts, he made a gorgeous coat rack.  He posted it on Etsy and was commissioned by a lady in Queensland to build another with 5 hooks for her husband for his birthday.  This is what he made:


Wild weather

Our building progress has been hampered by some unseasonal weather over the last 18 months to 2 years.  We have had some fierce storms locally in the last 2 years that have seen sheds and houses blow down.  We have even had reports of a home near to where we are building where all the westerly facing windows shattered in a particularly windy storm. 

While this has been great for assisting the grove of blackwoods that have self-sprouted on the block, it has seriously hampered building effort and caused much frustration on my behalf.  

I cannot count the number of times I swept the slab to assist in the evapouration of puddles so we could connect the generator to do about 10 minutes work only to have to pack up the generator and sit in the car for half an hour before sweeping the slab again.

Until we had the roof on progress was severely hampered when the weather was wet as we were relying on the generator to run power tools on extension leads which cannot be safely used when the ground is wet.

There were many times when we would sit in the car and fog it up while we waited for the rain to clear.  There were also plenty of times when we would pack up thinking the rain was going to set in for the day and go home (20 minutes away from the building site) to find that the weather cleared an hour later and it stayed dry for the remainder of the day.

Saturday, 18 February 2012

Working with milled timber


As we progressed through the building process we found that we would just master a skill and it was time to move onto another, new, unfamiliar task.  This started with the posts and beams and continued all the way through the build.

We had recycled the timber required for the posts and cut the timber for the beams so when it came to build the structural wall that braces the shouse in the east-west direction we were incredibly surprised how light the timber.  We no longer needed two people to move a piece of timber! 
 
We decided to stick with F17 hardwood for the structural wall.  We figured it was structural so thought it best to build it out of Australian hardwood.  We started by cutting all the required pieces to size then laid the timber out on the slab to make sure all components would be in the right place.


There was only one door to account for an no windows so it was a pretty straight-forward construction.  We were amazed that, within a day, a whole wall was build.  AND put into place.  The structural wall had two load bearing studs which were triple studs with which to hold up the beams.  These essentially acted as posts within the structural wall.

You can see in the photo above that the top plate of the structural wall is in tact.  We decided that it would be stronger like this and elected to chisel out the section where the cross beam would sit when the beam was ready to go up.  This may not have been the brightest move as it was a nightmare to remove the top plate once the wall was up.  Especially because, without the two beams providing support to the wall it was actually surprisingly wobbly.  

The bottom plate was dynabolted to the concrete and the two ends were essentially nail plated to the beam on either end of the wall.  Still, there was a far bit of flex in the wall.  Once the beams were attached, the wall was much stronger but it was not until the joists went up that it really firmed up to our (read my hubby's) satisfaction.

Thursday, 16 February 2012

Return to roots

My hubby and I met while studying forestry at the University of Melbourne.  We both love the outdoors, adore trees and are passionate about the environment.  Studying a degree in forestry gives one skills that most ordinarily don't get.  For example, we spent a week learning to us an axe - sharpen, cross cut and fell.  Naturally, we also spent a fair bit of time on the end of a chainsaw.  Don't get me wrong, there's much more to forest science than chopping trees down but unless you are one of the lucky ones (in my opinion) to move into a career with Parks Victoria then a certain component of any core forestry job involves falling and processing trees into timber or timber products.

In another attempt to save money and get the desired look for the final build that we were hoping for, we decided the best thing was to cut and mill the timber for our beams ourselves.

It's about here that I should probably take a little deviation and talk about the design of our home.  We started planning on building our home before we even got engaged.  In fact, if truth be told, I have been designing homes since before I could use a ruler with any degree of accuracy.  I remember frustrating my Dad no end asking him to draw the houses I had designed in my head.  I'd compile ideas from visiting friends, watching movies (The Sound of Music was life-changing for me and meant that every double story design included a double staircase) and looking at housing ads in the local paper and then get him to draw it.  Whenever he didn't quite understand what I meant, we'd both end up getting flustered.  This lasted until I was about 8 and mastered the use of ruling straight lines and right angles at which point Dad would be able to move from architect to critic and admirer.  

Anyway...  We had always planned to have a large (by modern standards) family.  We are both home bodies and get great enjoyment from being in our own environment.  We like to grow and preserve our own food.  Add to that the fact that my family are based in Melbourne; we were planning on living in country Victoria (aiming for Leongatha which is half way between both sets of grandparents) and we have friends scattered across Australia and overseas who we like to have come and stay with us and you'll see why our final house design included 5 bedrooms, 3 bathrooms, open plan living, a library, a generous laundry and a pantry that was bigger than our bedroom.  My husband is a very bright man and decided that it was probably not going to be feasible to build such a grand design while based in Melbourne, working full time and with two young children.  So, we decided that we would build a shed in the same design as the house, master any techniques we'd need and then live in the shed while we built the house.

We spent a great deal (read months if not years) researching different materials with which to build a house.  My husband had always dreamed of building a stone house.  We didn't have to investigate that option for very long before we ruled it out.  Unfortunately we are not millionaires and it seemed to us that we would need to be just that if we were going to build out of bluestone.

I suggested strawbale and we umed and ahed for a while until my husband settled on mud brick.  For a while my husband was convinced we were onto a winner.   The thought of making a thousand mud bricks by hand was not appealing, I must admit.  While I liked the idea that the dirt we removed for the cutting would be recycled and used to build our walls I just couldn't see myself moulding clay into bricks and laying them to bake in the sun.

Then he investigated rammed earth and that was all the rage.  Until we read that someone in southern Victoria had no end of trouble with rammed earth being affected by driving rains.  As we had bought a block in an area that has an annual rainfall nearing 1000mm per year and where the prevailing westerly winds are sufficient enough to justify a windfarm and we decided that mud brick was off the list.  So we did some further investigation and found a product called timbercrete.  Finally we thought we were onto a winner.  We spoke at length to the manufacturers, had the MSDS and independent investigation report sent though and I had even picked the finish I liked.  We travelled to Mirboo North to see a home made from timbercrete and fell in love.  While it was not stone, it looked close enough for my hubby and we were sold on the insulation and termite resistant properties and the fact that it can be nailed and screwed just like timber.  I particularly liked the fact that the bricks would be manufactured elsewhere and the integrity of my skin would not be compromised by working for long hours with moisture-sapping clay.

Unfortunately, neither of us were bricklayers so once we factored into the cost of the build the fact that we would have to buy in labour we reluctantly admitted that we could not afford it.

So, back to the drawing board we went.  I again suggested strawbale and we looked in earnest into the costs and required skill level to construct a post and beam strawbale house.  While you can make structural strawbale homes, we like timber and if I had to have exposed posts then they were going to be timber rather than steel or concrete.  We found an engineer willing to work with us and he scrawled all over the plans we had drawn and we submitted them to our building inspector and we were on our way.

Fortunately, the Alberton West bridge had been pulled down in about 2001 and the shire had not wanted to cart the timber away so it was stacked on my in-laws farm.  Much negotiations took place and my in-laws agreed that we could pick over the stack and take the timber we needed for the posts.  The beams we would cut ourselves.

So, we bought a brilliant Stihl with a ripping blade and a milling attachment and again managed to convince my in-laws to let us make use of some trees that had fallen in a patch of bush on one of their farms.

In April 2009, while the slab took 6 weeks to cure, my hubby worked like a beast to mill the timber for the beams.  It was at about this point that I started to become thankful that our journey into building started with digging.  Green timber weighs a ton!
Pushing the saw was tough work
Beam 1 (out of 12)


Falling a tree

Hubby displaying his awesome forestry skills

Kit
 Entertaining children while trying to work with a chainsaw is not an easy feat.  Thankfully, being autumn there were pockets of mushrooms to be found.  We'd send the kids off to find the best sample of each type while we worked (in about 10 minute blocks) and then I would go and have a look at them.
We found an array of mushrooms
 We also found huge patches of native orchids

Stripping bark

A board was used to ensure the first cut was straight


While sourcing timber we found a beaten up David Brown 880


The kids, especially Master Padawan, thought it was awesome and tried to convince us to do it up and take it to the block with us.  Unfortunately, after much research and attempts to get parts, my hubby decided it was not worth rescuing.

 The beams were finally cut in July 2010 and made an impressive stack


Next was to transport the posts.  Again we were thankful for a warm up.  While the beams were heavy the posts, at a minimum 200x200mm, and ironbark at minimum 3m lengths were NOT light.


Young Padawan was convinced he could use the chainsaw so my hubby decided he could try to hold it while it was off to see how heavy it was

Padawan attempting to smile while he holds the weight of the 660
Hubby, being who he is, showed Padawan how much of a difference man muscles make.  


He-Man

Needless to say, with only woman muscles (and as much as I am an advocate that woman can do what men can, they can't), I was reduced to moving off-cuts out of the way and loading them onto the trailer to salvage for firewood or to turn into charcoal for the forge.  The nails were salvaged for use in the forge and some were turned into pegs for a coat rack that my hubby was commissioned to make.


The kids were glad to be out of the mosquito infested forest and had a ball running around in the paddock while we worked.  It helped that the stack of bridge timbers is on the main road between home and Yarram and that the in-laws travel the same route so the kids were lucky to have a couple of visits from Grandpa while we were working.  
 
Due to the weight of the timber, we could only transport 2 posts at a time in our trailer.


 We transported the posts home as an interim step as we needed power to be able to remove all the nails and bolts before transporting them to the block.