Monday, 9 April 2012

Family love

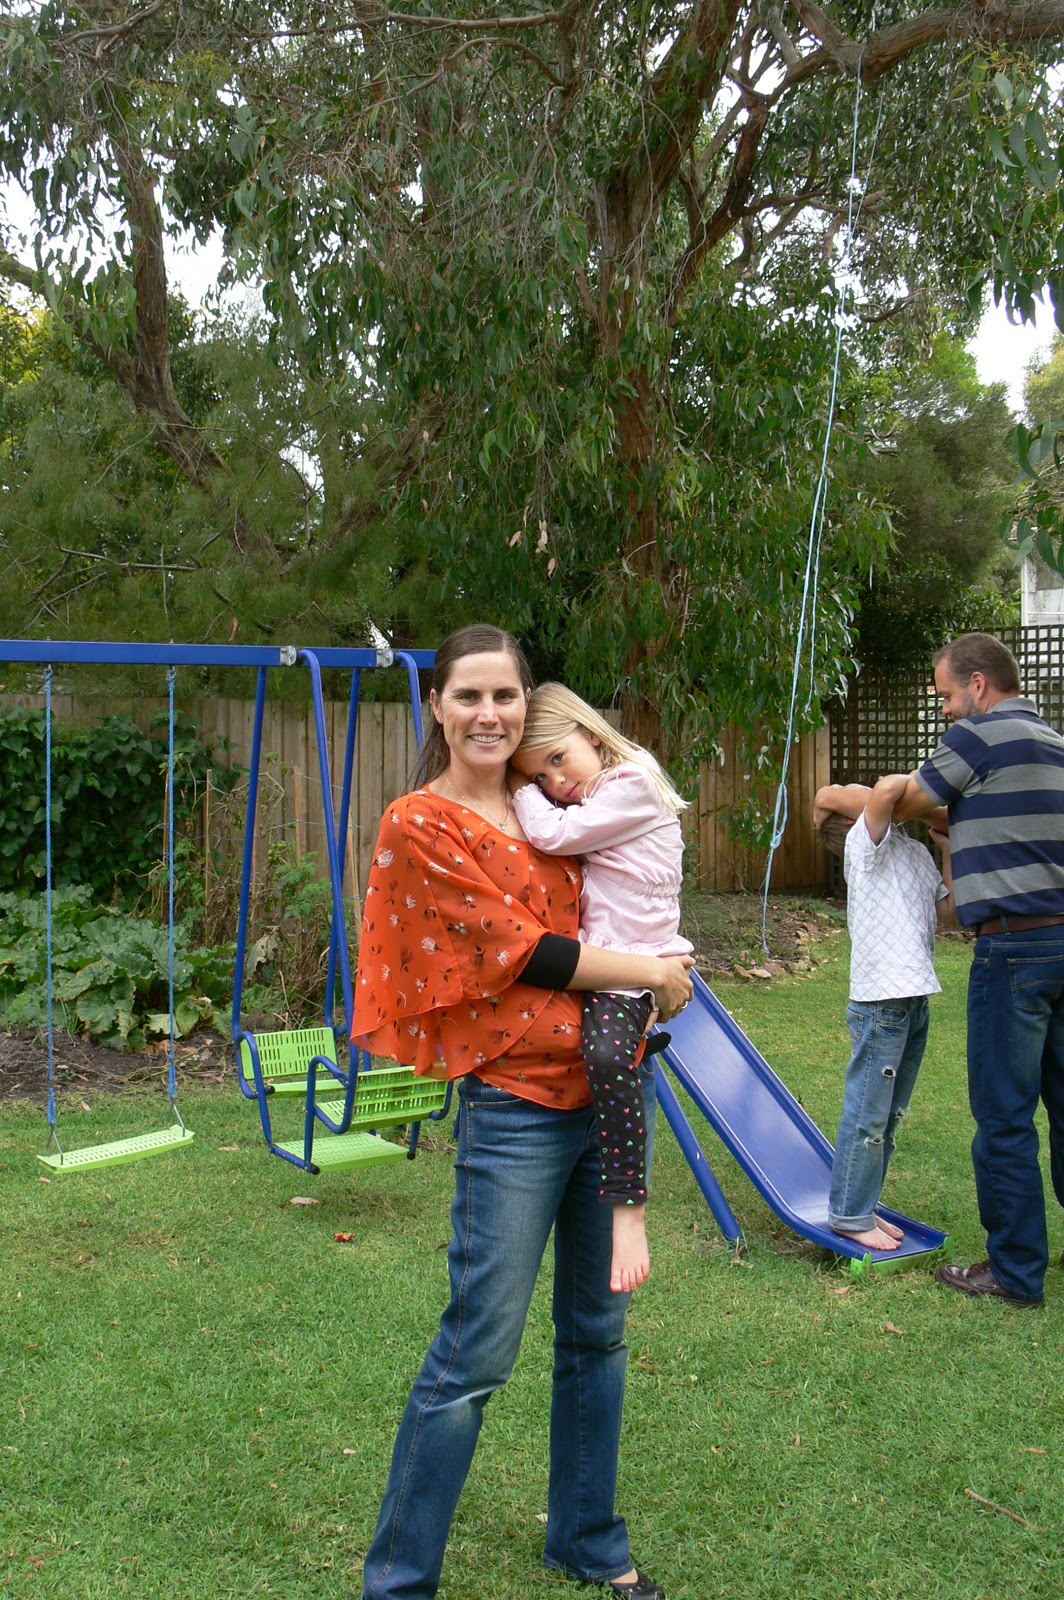
Recently, little miss and padawan spent a day with their Gran and Grandpa.  During that time, little miss found some photos of the gentleman builder and Gran.  As a result, she decided she would like a set of photos of out family where the gentleman builder and I were holding little miss and padawan.
So, we had our sister-in-law take some family photos recently.  We were all dressed up for a family baptism so it was the opportune time to take some photos.


 I love the look on the kids' faces in the photo below.  They didn't believe that I would actually jump into the gentleman builder's arms.

The benefits of La Nina

Wild weather in November

coupled with a wet summer, has meant that our tank is overflowing

The joys of a custom build

There are many people that visit us at the block and they are almost always surprised at the quality of the workmanship.  The gentleman builder and I are amateurs when it comes to building.  I was lucky enough to have a very talented father who endured my 'help' on many home DIY projects over the years.  Being a very patient man, the gentleman builder, like my father before him, endures my 'help' on building the shouse too.
The gentleman builder spends many frustrated hours fixing the 'work' I have done with the best of intentions but that does not come up to his exacting standards.  While I have the enthusiasm, I lack in technique.  I love building and find it very rewarding but I am, alas, not as skilled as my husband or my father.  I have a mean hammer arm and I can render with the best of them but there are many things that I am not so skilled at (skew-nailing and accurate saw work are the first two things come to mind).
Nevertheless, my husband has persevered (perhaps as I work to fund the project; or is that too cynical?) and he has created an incredible purpose-built space that is morphing into a home on an almost daily basis now.
While over Christmas we were dreaming of moving in over Easter, that has not eventuated and there is still a long list of things to do before we can get the building inspector in to sign off on "our" build.
One of the joys of building something yourself, that you have designed and laboured over, is that it becomes an extension of your belief system and values.  As a family, we firmly believe in sustainability.  We love our children and spend a great deal of time with them.  We take pride in the work that we do and make conscious decisions when it comes to things we consider important. 
I love to watch padawan and little miss explore our block and take great pride in the things that they do.  Recently, we rendered the second coat on the south wall and, as a result the tarps on that side of the house came down.  This revealed the view to Corner Inlet from the south-facing window.  The children loved it and asked me to move the table and chairs so they could make use of the wide sills and take in the views.


Also, insects love to be on our house.  We regularly find stick insects on the north wall, sunning themselves and generally being happy.  Last week, I found a grasshopper inside.  Taking time out from the heat, no doubt as it was a particularly warm autumn day.
 To me, this indicates that the house is truly non-toxic.  Insects would not ordinarily choose to make home in something that would cause them damage.  I like that we will be living in a home that is safe.  That will not be off-gassing noxious crap to infect our lungs and cause us distress.  I hope that I will have fewer migraines when we are living in the shouse as I am sure that the fumes from the paint that we used in the house that we are in currently contribute to that particular ailment.

We have one structural and one non-structural wall in the shouse as well as the roof downstairs and in the attic that will be painted.  We have been experimenting with natural casein paints as we cannot afford to buy low VOC paints that are commercially available.

We trialled a number of options, from left to right:
  1. Straight lime putty which has been rejected because it imparts a powdery residue when you rub it
  2. Lime putty with PVA which performed really well but has been rejected because of the smell
  3. Lime putty with PVA and pigment (which we made from crushing some rocks from the driveway) - also rejected due to the smell
  4. Casein paint - recipe needs refining as the batch we made on the test strip below was too watery
  5. Casein paint with pigment - again, the recipe we used for the test strip was too runny
I like the colour of the lime putty and PVA mix but the smell is too offensive in our very inert home.  We're in the process now of trying to perfect a casein paint.

Rayburn Royale

When designing our home, we incorporated a wood-fired stove.  The main reason was that we figured we have 50 acres and plenty of trees so we would be able to harvest timber from our property in a sustainable way to fuel the stove.  Secondly, we like the idea of slow cooking.  The gentleman builder loves stews and I cannot go past a good soup, especially in autumn.  Those cold days where you cannot justify starting a fire (or turning on the heater) but want something warm and tasty for lunch are perfect soup days, in my opinion.  
Just today, I made a vegetable soup with produce generously given to us by the gentleman builder's mum.  It contained fresh organic carrots, beetroot and zucchini in stock and tinned tomato base.  Delicious!
We had been looking for a second-hand Rayburn Royale for months when the Gentleman Builder came across an ad in The Weekly Times.  I knew straight away that it was the stove for us, even though the ad was generic and did not specify the brand.
The Rayburn Royale is made by AGA and, unlike the AGA, designed for solid fuels.  I had my heart set on a white or cream model but we were getting desperate so was willing to negotiate on that point, if a stove in good condition came along.  We had a firm budget of $3000 including transport.  We had seen plenty of good Rayburns which would have come in at $3200 but we just could not afford to extend beyond the budget.  After the purchase there would be additional costs involved in repairs (inevitable when you move something that weighs 300kg and is probably 50 years old), additional parts (our roof is tall and most second-hand stoves do not come with a flue included), and installation (the water jacket needs to legally be connected by a plumber).
When the gentleman builder called the number in the ad, the news was good.  The price, including transport, would be less than we budgeted and when the photos came through, the stove was white.  We purchased and the sellers very kindly assisted us in getting the stove onto a pallet and to their local depot for collection by the trucking company.  We collected from Stoites in Welshpool where they kindly used a forklift to put it into the trailer and just had to work out how to get it safely off the trailer and into the shouse.
The gentleman builder had prepared well.  He had moved the pile of ironbark beams to fashion a ramp that was the right height for the trailer and we made a monorail to use some metal rollers to get the stove around the north and east sides of the shouse and into the front door.


Padawan and little miss were somewhat excited about the acquisition.

Part of the recycled packaging warned to bend your knees to lift the box with a weight of 10-16kg.  Funny when the stove weighs more than 300kg and with both the gentleman builder and I pushing we could barely move it until it was on rollers.
 The monorail we set up to get the stove from the trailer to the north of the house, around the east side and in through the front door.
The stove has an inbuilt hot water jacket which will boost the solar hot water in winter.  This will be plumbed in when the second fit is done.

The gentleman builder was pretty happy with the condition of the stove.  We're all looking forward to the first roast meal we cook in the 'new' stove.

Interior fit

With the plumbing and electrical phase one complete, the gentleman builder sanded and stained the beams with a mix of linseed and tung oil.  The transformation was a bit Cinderella and we are very happy with the result.


The shower base was installed with cement sheeting and silicone at the joins.

We spent a great deal of time researching insulation.  Ideally we would have loved to have purchased a pure wool insulation.  In the UK you can purchase pure wool insulation, in New Zealand 100% wool that is treated with borax.  In Australia, you cannot get such great products (note to Australian wool growers - there is a potential market here).  So, we settled for Earthwool.  It is made from recycled glass (read, beer bottles) and is lower VOC than any of the other products we looked at.  You still need the full garb of safety gear to cut and install it but it's much less itchy than standard pink batts.


We purchased a second-hand plasterboard lifter and what seemed like an awful lot of pasterboard.


We started with the internal wall. Covering it with plain plasterboard made such a huge difference to the space.

Serious measurements were required to get a close fit around the irregularly shaped beams.
 The result was pretty good!
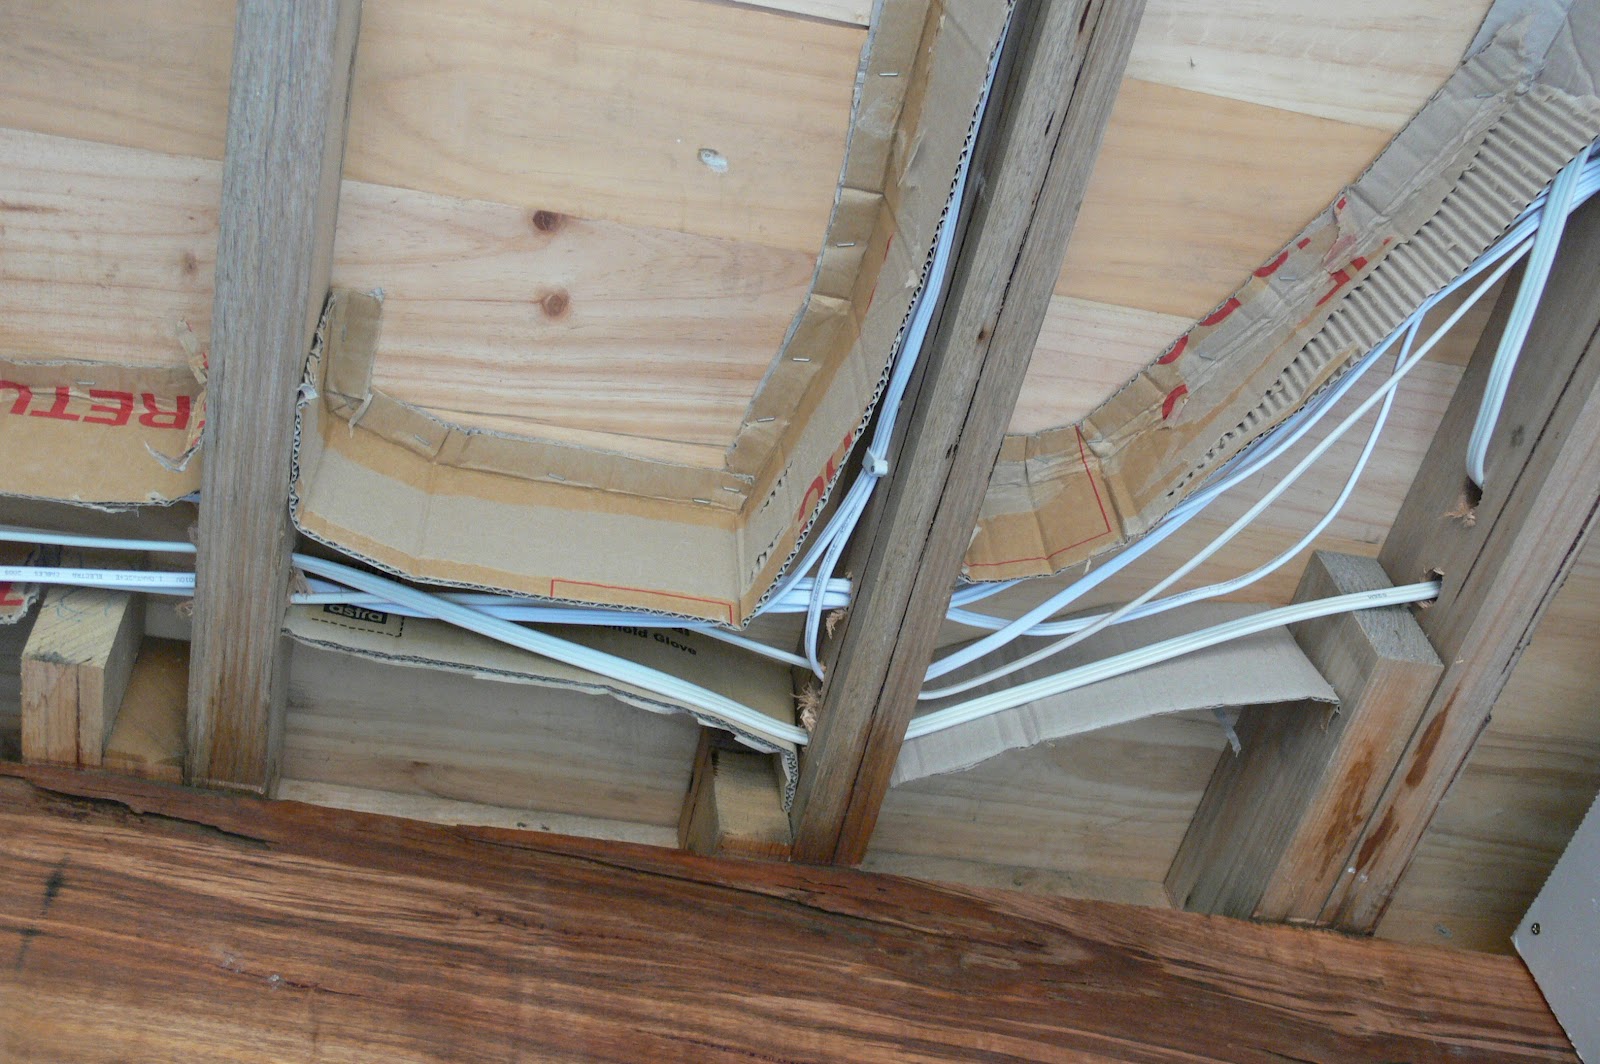
After the insulation dramas the resulted from the Victorian government rebates in 2007, changes were made to the building code which now requires a 5mm air gap between insulation and electrical cables.  To achieve this you can purchase "standard" cardboard separators.  These are available in standard nominal widths to suit common building timbers.  We went for a cheaper option and recycled the cardboard boxes we get when we purchase fruit and vegetables from our local green grocer.

 Again the trusty staple gun earned its place among our most treasured tools.
The Earthwool insulation was cut to length and installed.  Initially we used string to hold it in place but we quickly learned that friction was enough to stop it from falling it we went straight to putting up the plasterboard.


Our joists were not standard spacing throughout the shouse because rather than employ the standard building practice which is to space the joists at 450mm centres and then the last two joists at whatever the leftover is.  Mathematician that the gentleman builder is, worked out how many joists we would need based on 450 centres then divided the space by the number of joists and spaced them evenly.  Thereby, we marked the location of the joists on the beam and the external walls so we could align the screws with the centre of the joists along the plasterboard.  
The external walls, being rendered by hand over strawbales, are far from square.  As a result, we utilised a technique which employs a pencil embedded in a block of wood to mark the wobbly edge of the plasterboard to match the profile of the wall.  A plasterboard saw made pretty easy work of cutting the irregular edge.


Now it is back to rendering the third coat inside before the electrician and plumber come back to install fittings and fixtures.


What goes on behind a wall

In November 2011, we were finally finished a full coat of render inside and removed all the strawbales.  We installed the conduit in the walls and were finally ready for the plumber and the electrician to do their first fit.

For a small house, it was amazing how much wire the electrician managed to install.

These wires will control the lights in the living and dining "rooms" and the fan in the space between the two.


It amazes me what a wall hides.  We have taken detailed notes about the location of the pipes and wires, especially in the bathroom where we plan to hang a mirrored medicine cabinet.

While I would have preferred the plumber to use entirely copper pipes, we just could not afford it.  I don't like the idea of unknown chemicals leaching from the plastic into our drinking water.  Unfortunately, we just did not have the finances to make a different choice.  We have consoled ourselves with the thought that at least our water is stored in food grade stainless steel and does not spend any additional time in plastic.


The chemistry of lime render

Lime render is made from lime putty and sand.  The render mix we make is three parts sand to one part lime putty with water added, as required, to make the correct consistency.

For the first two coats of render we used washed sand.  For the final coat, we will use fine washed sand.  Ideally, with lime render, you want the strongest coat as the first coat and for subsequent coats to be weaker.  To achieve this, our first coat outside was made with one part red brick sand, two parts washed sand and one part lime putty.  The only problem with this is that the brick sand has a clay component to it which shrinks and swells.  As such, the first coat outside cracked quite considerably.  We've learned over time that it's best to keep water up for at least three days after putting a coat of render on.  This means that the render dries slowly and is less likely to crack.

You can purchase lime putty but it's costly so we make our own.  We purchased two second-hand food grade 220L plastic containers that we used to make lime putty in. We make our lime putty in a ratio of roughly one part hydrated lime to one part water (by weight).  You can get hydrated lime from hardware shops as it is used in making concrete.  Making the lime putty requires a great deal of mixing.  Ineffective mixing leads to hard lumps of lime in the render.


Hydrated lime (calcium hydroxide) is made from limestone.  The limestone (CaCO3) is mined then baked at high temperatures (about 800 degrees Celcuis) to release carbon dioxide (CO2) and leave behind calcium oxide (CaO).  The calcium oxide is then slaked (by adding enough water until the exothermic reaction stops) to produce hydrated lime (Ca(OH)2).  We then take the hydrated lime and add more water to make lime putty.  

The lime render applied to the walls and then reacts with the carbon dioxide in the air and reverts back to calcium carbonate. So essentially our straw bales will be covered in rock!

As the render dries it gets whiter